DIY Wood Picture Frame
When you make a purchase through links on our site, we may earn an affiliate commission As an Amazon Associate I earn from qualifying purchases..
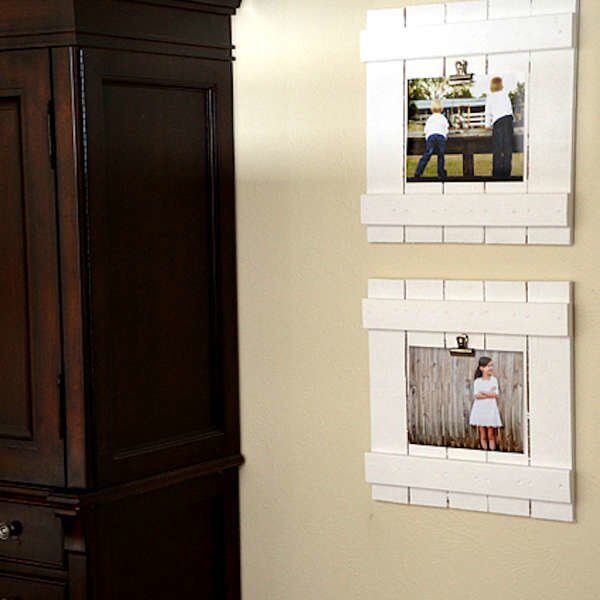
If you are looking to make some simple yet elegant picture frames, then I have some good news for you. All you need to do is follow a few easy instructions.
Building a Classic DIY Wood Picture Frame: Step-by-Step Guide
Showcase your favorite photos or artwork with a stylish and personalized wooden picture frame. This guide provides instructions for creating a classic frame design, allowing for customization to suit your preferences.
Materials:
- (4) pieces of 1″ x 2″ lumber, cut to your desired length (for the frame)
- Miter saw or circular saw with miter box
- Wood glue
- Sandpaper (various grits)
- Finishing materials (paint, stain, etc. – optional)
- Clamps (optional)
- Screws (optional – for added reinforcement)
- Drill (optional)
- Tape measure
- Pencil
- Glass or acrylic sheet (cut to the size of your picture)
- Mat board (optional, cut to fit inside the frame)
- Picture hanging hardware (optional)
Instructions:
1. Planning and Measurement:
- Determine the size of your picture: Measure the width and height of the picture you want to frame.
- Calculate the frame piece lengths: Add 2 inches to each picture dimension to determine the total length needed for each frame piece. For example, if your picture is 8″ x 10″, each frame piece needs to be 10″ (picture width) + 2″ (buffer) = 12″ long.
2. Cutting the pieces:
- Use the miter saw (or alternative) to cut the 1″ x 2″ lumber pieces according to the calculated lengths at 45-degree angles for a proper corner fit. Ensure clean and precise cuts for a professional look.
3. Sanding the pieces:
- Sand all surfaces of the pieces using various grits of sandpaper, starting coarse (around 80 grit) and progressing to finer grits (around 220 grit) to achieve a smooth and finished feel.
4. Applying the finish (optional):
- You can paint, stain, or apply a clear sealant to the frame pieces before assembly (optional). Choose a finish that complements your picture and décor.
5. Assembly:
- Dry fitting (optional): Before applying glue, dry-fit the pieces together to ensure they form a square frame and the corners meet seamlessly. Make adjustments to the cuts if necessary.
- Applying glue: Apply wood glue to the ends of the frame pieces where they will meet at the corners.
6. Joining the pieces:
- Option 1 (without clamps): Carefully hold the pieces together at the corners, ensuring the mitered edges align flush, and hold them in place until the glue dries according to the manufacturer’s instructions.
- Option 2 (with clamps): Apply clamps to the corners to secure the pieces firmly while the glue dries.
7. Adding reinforcement (optional):
- For additional strength, especially for larger frames, pre-drill pilot holes and screw the pieces together at the corners from the inside of the frame.
8. Preparing the back panel (optional):
- Cut a cardboard or thin plywood piece slightly smaller than the inner dimensions of the frame to serve as the back panel.
- Attach the back panel to the frame using staples, nails, or glue. This step is optional and can be omitted if you prefer an open-back frame.
9. Finishing touches:
- Once the glue (and any paint or stain) is completely dry, sand the assembled frame lightly with fine-grit sandpaper to remove any imperfections.
- You can add a final coat of clear polyurethane for extra protection and shine (optional).
10. Assembling the framed picture (optional):
- Cut a mat board (optional) to fit the space between the frame and your picture, creating a border.
- Place the picture centered on the back panel (or mat board, if used).
- Secure the picture and backing with framing tape or photo corners.
- Attach picture hanging hardware (optional) to the back panel for wall mounting.
Tips:
- Double-check your measurements and cuts for accurate assembly.
- Use a sharp saw blade for cleaner cuts and less sanding afterward.
- Consider incorporating decorative elements like painting designs or applying embellishments to the frame before finishing.
- This is a basic guide, and you can experiment with different wood types, frame widths, and finishing techniques to create unique and personalized picture frames.
Safety:
- Wear safety glasses and gloves when using power tools.
- Be mindful of sharp edges and take precautions to avoid cuts.
Mod Podge
If you’re looking for a way to add some color to your decor, try making a Mod Podge picture frame. It’s an easy project, perfect for beginners, and you can customize it to make it truly one-of-a-kind.
You can use a variety of items to create a Mod Podge picture frame. You can start with an old book or a newspaper, or you can get creative and use scrapbook paper. You can even use craft glue to decorate the frame.
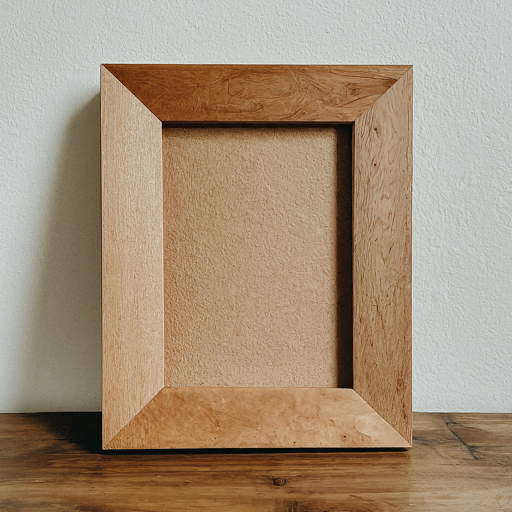
For a more unique and modern look, you can also consider using a wooden picture frame. You can paint the outside of the frame, or simply stain the wood. Then, you can apply Mod Podge. This will give the wood a more rustic look and will make it easier to remove the paper once you’ve hung it.
If you want to make your Mod Podge frame stand out, you can use fabric. You can either trace the shape of the frame onto the fabric and cut it out, or you can Mod Podge the fabric on top of a piece of wax paper. Once the fabric is dry, you can begin adding the paper.
Another option is to make a mosaic picture frame. The mosaic pattern is made by cutting out pieces of mosaic tiles. If you don’t have the time or the skills, you can buy a ready-made frame. It’s also possible to make a rustic picture frame by tracing shapes on thin pieces of wood and securing them to the bottom and top of the picture.
You can use patterned paper for this frame, or you can use wrapping paper or shelf paper. You can also apply decoupage glue to the paper.
Duck Tape
Wooden picture frames are a great way to display your pictures. They are easy to make and inexpensive. You can use scrap wood, paint, and other materials to create a frame that suits your style. These frames are also very sturdy, so they can last for many years.

These DIY picture frames are a great way to create a unique piece of art for your home. They also make great gift ideas. If you have extra wood, you can use it to make a key holder or key chain. You can also customize your own frame with washi tape.
For a more colorful and unique look, use colored pencils to create a picture frame. This is a fun craft project that is perfect for all ages. You can make a frame for the holidays, or you can add color to your wall for any time of year.
If you want to use your favorite holiday designs, print them out on card stock. You can also use old nail polish to create marbled frames.
You can also make a frame out of dollar store picture frames. These are very cheap, and you can make them more interesting with paint and decorative supplies. You can also find durable frames at online retailers and craft stores.
If you have extra wood on hand, you can create a simple picture frame key holder. It is easy to do, and it will add a touch of elegance to your home. You can make a variety of frames using different sizes and designs.
You can also turn an old notebook into a beautiful picture frame. You can cover it with washi tape, paint, or other decorations. You can also use a jigsaw to cut a box out of it. You can then attach the box to the floor with four screws.
Tissue paper
Tissue paper picture frames are a wonderful craft that anyone can do. They are easy to make and are great for both beginner and advanced craftspeople. They are inexpensive to create and make a lovely gift. Moreover, they are a good practice for gluing, cutting, and folding.
There are various types of tissue paper, so be sure to choose one that is appropriate for your project. It can be used to create different types of pictures, such as a baby’s first photo, a child’s first birthday photo, and a family photo of all generations.
Once you have your square patterned paper cut out, you need to fold it into a frame. Use a foam brush to apply light coats of glue to the back of the paper. This may take a few minutes to dry.
Next, you need to decide how you will decorate the frame. You can do this by using scrapbook paper or by painting it. You can also use pages from old children’s books or seed packets. You can also add some twine or a handsaw.
You can also use a clear plastic as a backing. This can be found at any home improvement store. If you want, you can use a glue stick to glue the flaps together, which will give your frame a nice finished look.
The trick is to get a smooth finish. You can sand the edges of the paper to get rid of any rough edges. A hobby knife works well for this task. You can also distress the frame with a sponge.
You can embellish your frame with stickers, small decorative embellishments, and a variety of colors. You can also use Mod Podge to seal the paper.
Dog bone
Whether you’re looking for something fun to do with the kids or just looking to impress the family pet, the dog bone woodworking project is a no brainer. Creating a custom picture frame with a dog collar is a great way to display your favorite furry friend. It can also be a fun and cheap gift for your favorite pooch.
Using a saw and a bit of luck, you’ll be able to create the perfect dog bone-shaped piece of wood. If you’re looking for a DIY dog photo frame, consider checking out the Dollar Tree’s selection. The aforementioned store also sells some adorable little clothespins that can be used to secure the picture frames to the wall. In case you don’t have a pet, it’s always good to put a little extra thought into your next home improvement project.
For those of us without a dog to cuddle with, you’ll need to get creative in order to repurpose your wood. For instance, you could use the same material to make a small tabletop desk atop a stairwell, or a decorative shelf display. Once you’ve figured out the best placement, you can finish it off with a good coat of paint and a few strategically placed screws.
One of the best parts of making your own dog bone shaped picture frame is that you’ll be able to customize it to your heart’s content. You’ll be able to display your favorite pooch’s most memorable moments with ease. Hopefully, you’ll be able to put your creation to good use as soon as possible. The end result will be a unique piece of art, and you’ll have a well-earned pat on the back for a job well done.
Other materials you may need
If you are making a DIY woodworking project picture frames, you will have to make sure that you get the right materials for the job. You can choose from several different types of materials. Some of the most common are wood and glass. If you are using glass, you will need a groove on the backside of the frame to allow the glass to fit in.
Wood is one of the easiest types of materials to work with. You can buy wood at home improvement stores or craft stores. You can also cut it yourself. For this, you will need a power saw or hand saw.
You can also use glass to mount your artwork. Depending on the type of artwork, you may need to use a hammer and nails to secure the picture in place. If you don’t have a hammer, you can use a glue gun.
You can buy matting in the form of pre-cut strips or cardboard. This material is perfect for filling the gaps between the picture and frame. You can get the matting in any color you like.
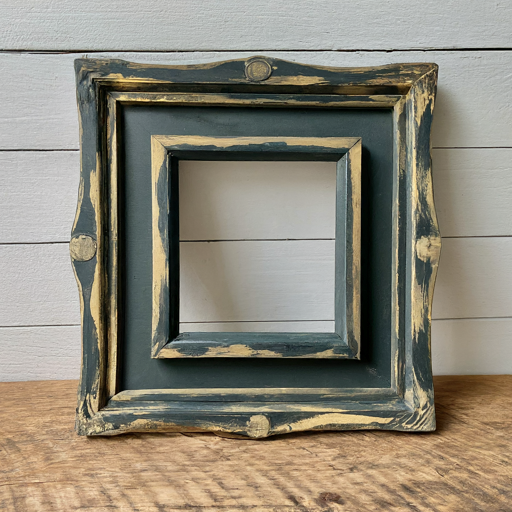
You can also decorate your picture frame with paint or other materials. Some of these are easily available at a hardware store. If you want to add a rustic look to your frame, you can spray paint or use a brush to sand the edges.
You can add a unique design to your DIY woodworking project picture frames. You can use stencils or small pebbles. Or you can just glue them to the wooden slats.
You can also use a power drill to make holes for the screws. The holes should be at least an inch apart to avoid breaking the wood. You can use thicker nails if your frame is going to be heavy.
Remember to always follow proper safety precautions when working with wood and power tools.