DIY Wood Coasters
When you make a purchase through links on our site, we may earn an affiliate commission As an Amazon Associate I earn from qualifying purchases..
Elevate your table setting and protect your surfaces with handcrafted wooden coasters. This guide provides instructions for creating simple yet elegant coasters, allowing for customization to your preferences.
Building Beautiful DIY Wood Coasters: Step-by-Step Guide
Materials:
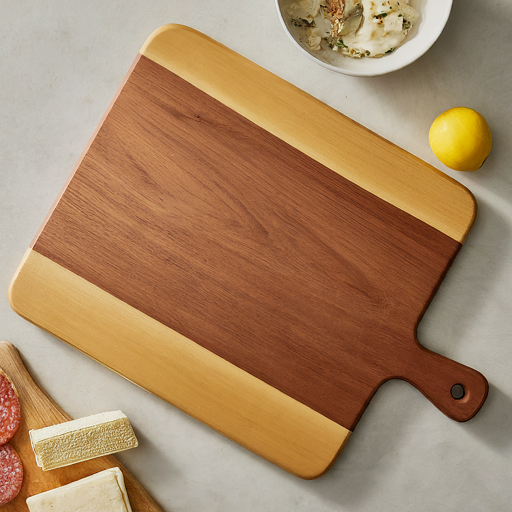
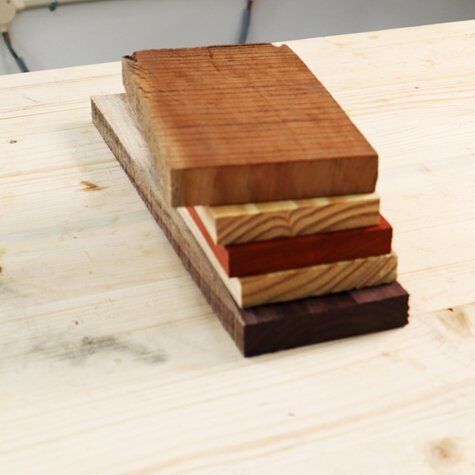
- Scrap wood pieces (consider wood types like maple, walnut, oak, or plywood) – thickness around 1/2 inch
- Wood glue (optional)
- Clamps (optional)
- Finishing materials (paint, stain, polyurethane, etc. – optional)
- Sandpaper (various grits)
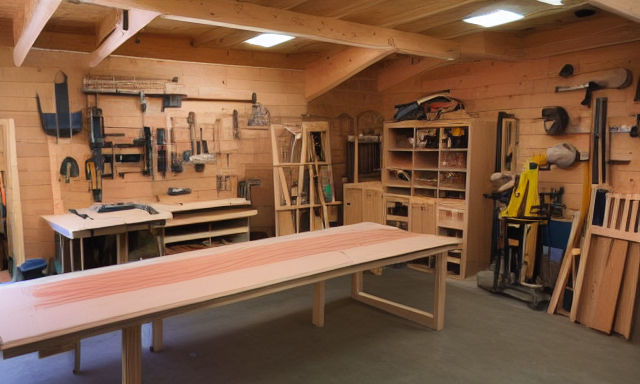
- Miter saw or circular saw with miter box
- Drill (optional)
- Sander
- Tape measure
- Pencil
Instructions:
1. Planning and Preparation:
- Choose your wood: Select appealing wood pieces with a minimum thickness of 1/2 inch. Consider using reclaimed wood, plywood cut to size, or leftover lumber from other projects.
- Decide on the size and shape: Determine the desired size for your coasters, typically square or round, and mark them on the wood with a pencil.
2. Cutting the coasters:
- Use your chosen cutting tool (miter saw or circular saw with miter box) to cut the wood pieces into the marked shapes and sizes. Ensure clean and precise cuts for a professional look.
3. Sanding the coasters:
- Sand all surfaces of the coasters using various grits of sandpaper, starting coarse (around 80 grit) and progressing to finer grits (around 220 grit) to achieve a smooth and finished feel.
4. Applying the finish (optional):
- You can customize your coasters with paint, stain, or a clear sealant before assembling them (optional). Choose a finish that complements your décor and consider its water resistance, especially if using them for beverages.
5. Assembly (optional):
- Option 1: Individual coasters: If you prefer individual coasters, skip this step and proceed to the finishing touches.
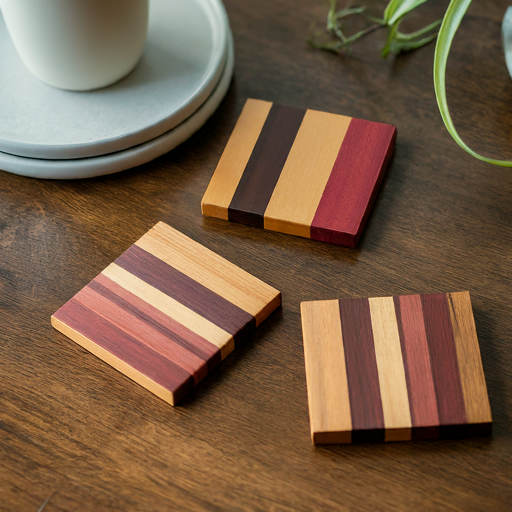
- Option 2: Glued coaster set (optional): For added stability and a more cohesive look, you can glue the coasters together.
- Apply a thin layer of wood glue to one edge of each coaster.
- Carefully position the coasters next to each other, ensuring they are flush and aligned.
- Use clamps (optional) to hold the pieces together firmly while the glue dries according to the manufacturer’s instructions.
6. Finishing touches:
- Once the glue is dry (if applicable) or the chosen finish has dried completely, sand the coasters lightly with fine-grit sandpaper to remove any imperfections.
- You can add a final touch of protection and shine by applying a coat of clear polyurethane (optional).
Tips:
- Double-check your measurements and cuts for accuracy before proceeding.
- Use a sharp saw blade for cleaner cuts and less sanding afterward.
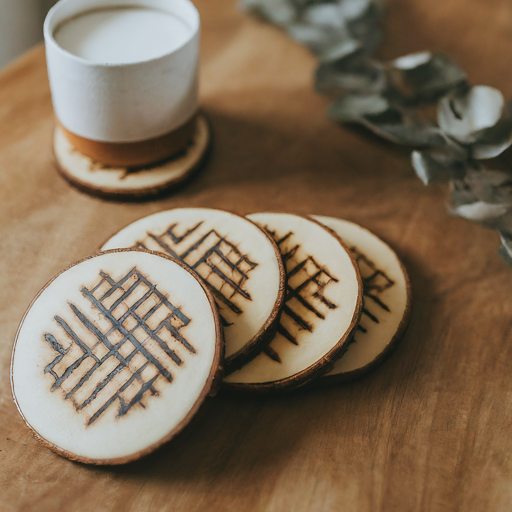
- Consider incorporating decorative elements like wood burning designs or painting patterns on the coasters before finishing.
- Experiment with different wood types, shapes, and finishes to create unique and personalized sets of coasters.
Safety:
- Wear safety glasses and gloves when using power tools.
- Be mindful of sharp edges and take precautions to avoid cuts.
Softwoods vs hardwoods
If you are thinking about making some DIY woodworking projects, you will want to be aware of the differences between softwoods and hardwoods. While hardwoods are usually more expensive and dense, they also have more potential uses. Depending on the project, you may want to use one or the other.
Although these two types of wood can be difficult to work with, both are durable and can hold up to a variety of weather conditions. You can find both varieties at your local lumberyard or home improvement store. However, you’ll want to choose carefully to ensure that your coasters will last for many years.
Softwoods are less dense and lightweight than hardwoods, but they also have a lot of advantages. These include their ability to absorb finishes and their versatility. These characteristics make them popular for a variety of projects.
Some common types of softwoods are birch, maple, hickory, and cedar. Other types are redwood, pine, and fir. They are often used for furniture and interior mouldings.
Softwoods are easier to cut and manipulate than hardwoods. They are also less likely to warp. Their softer appearance can lend a rustic look.
Hardwoods on the other hand, are more expensive and can be more challenging to work with. This makes them more expensive and more commonly found in high-end furniture and flooring. The reason is that these types of wood are harder and have fewer pores, which helps them withstand moisture better.
Both types of wood are available in different colors, so you should be able to find something that is appropriate for your DIY woodworking project. You can opt to sand it to get a smooth finish or to stain it to give it a more elegant look.

If you have a lot of coasters to make, you may want to go with hardwoods. The reason is that you can get them for a lower price. But be sure to check with your local home improvement store to see if they carry hardwood. If they don’t, you’ll have to head to a specialty store.
Sealants for woodworking project coasters
You can find a variety of sealants for diy woodworking projects. Each one offers its own benefits and provides different levels of protection for your finished coasters. The best type of sealant is one that protects from moisture and prevents the finish from chipping or fading.
Lacquer, enamel and polyurethane are three of the most common types of sealants. Each provides high quality protection against water, and they are easy to apply. You can choose from spray or brush versions. There are also oil-based clear coats that offer better protection than the water-based varieties.
When it comes to sealing your wooden coasters, the easiest way to give them the most protection is with polyurethane. It can be applied with a foam roller or brush. It is easy to clean up, and is ideal for light colored woods. However, it will not last as long as an oil-based finish.
Shellac is the most durable and expensive type of sealant for your wooden coasters. This sealant has a strong odor, and should be applied in a well ventilated area. You should also use a thin layer, and repeat the process until you have reached your desired level of protection.
Polycrylic is another good option, but it is less durable than polyurethane. It also dries quickly, so you will need to apply multiple coats to achieve a good finish. It is non-toxic, and you can find it at most hardware stores. The milky finish makes it especially appealing for lighter woods.
It can be applied to both colored and unstained wood. The color is not permanent, so it is important to test it out before applying. The finish will also allow the wood to shine through.
The cost of sealing your wood coasters will vary depending on the type of sealant used and the number of coats you apply. A typical cost is about 10 to 20 cents per coaster. The cost will also depend on the type of wood you use. If you are using cork or felt, you can skip the sanding and application steps.
DIY coasters made from tree branches
If you’re looking for a way to add a touch of rustic charm to your home decor, try these DIY woodworking project coasters made from tree branches. They’re a fun craft to make, and can be customized to your liking.
In this Instructables tutorial, Mike walks you through selecting seasoned wood, cutting it into a non-square natural shape, and finishing it for durability. This project is also a great way to use up scrap wood.
The basic materials for this project include a few wood slices, a seasoned log, a saw, sandpaper, and a few tools. Once you have the tools, you can begin making the coasters.
First, clean the logs. Using a stiff brush, sweep up any loose bark. Afterwards, you can chisel away the bark with a hand plane.
Next, cut the tree limbs into thin slices, about half an inch thick. You can choose the size of your wood slices, but keep in mind that your wood coasters will have a rustic, aged look.
You can make a shelf with the tree limbs, too. To do this, attach a metal rod to a branch’s thick base.
Finished coasters are beautiful. You can decorate them, stamp them, or burn them for an extra custom look.
You can make these coasters for any occasion. They are large enough to hold a mug comfortably, and are durable to prevent liquid from slipping. They are waterproof, too. A good pair of wooden coasters can protect your furniture and keep your drinks safe.
Whether you’re making one for yourself, or giving them as gifts, these DIY coasters are a great way to show off your personality. You can customize them with your favorite paint or stain. They’re also perfect for entertaining.
You can make a set of these simple woodworking project coasters for a fraction of the cost of buying them. They’re the perfect gift for any occasion. They’ll protect your table top and your friends’ surfaces from stains. They’re also easy to make, and a fun woodworking project for beginners. Having these coasters will keep you from worrying about spills and rings on your furniture.
Remember to always follow proper safety precautions when working with wood and power tools.