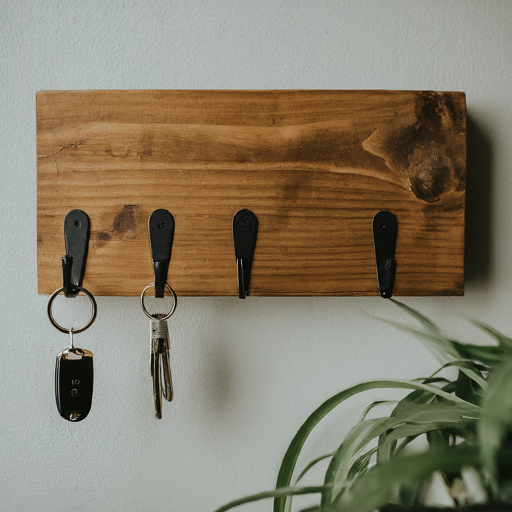
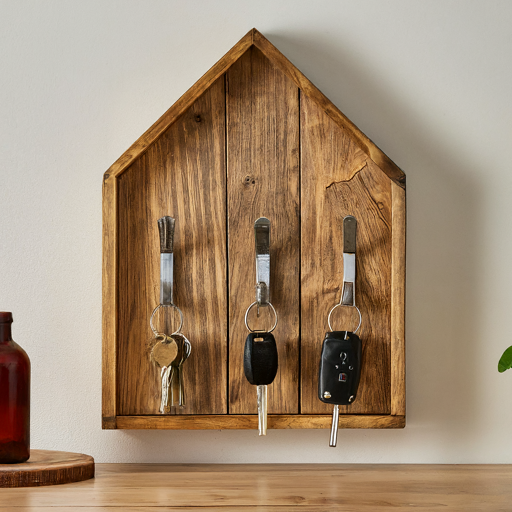
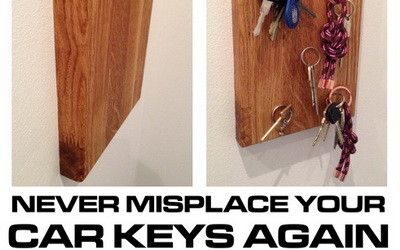
DIY Wood Key Holder
When you make a purchase through links on our site, we may earn an affiliate commission As an Amazon Associate I earn from qualifying purchases..
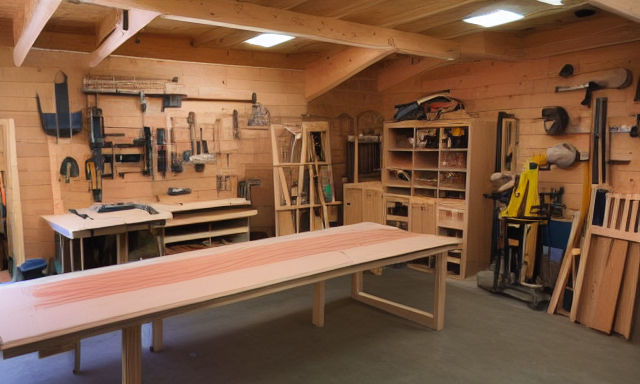
In this article you’ll find instructions to make a beautiful, personalized key holder out of wood. The best part is that this project is completely customizable – you can choose the type of wood and the finish that you prefer.
Building a Simple DIY Wood Key Holder: Step-by-Step Guide
This guide provides instructions for creating a functional and stylish wood key holder, keeping your keys organized and easily accessible.
Materials:
- (1) Piece of wood (consider pine, plywood, or reclaimed wood) – size depends on your desired design
- Wood hooks (quantity depends on your needs)
- Wood glue
- Sandpaper (various grits)
- Finishing materials (paint, stain, etc. – optional)
- Screws (optional)
- Drill
- Miter saw (or circular saw and miter box)
- Tape measure
- Pencil
Instructions:
1. Design and Planning:
- Decide on the size and shape of your key holder. Sketch a design or browse online for inspiration.
- Determine the number and placement of the key hooks based on your needs.
2. Cutting the wood:
- Use the miter saw (or alternative) to cut the wood piece according to your design. Ensure clean and accurate cuts.
3. Sanding the wood:
- Sand all surfaces of the wood piece using various grits of sandpaper, starting coarse and progressing to finer grits, to achieve a smooth finish.
4. Applying the finish (optional):
- You can paint, stain, or apply a clear sealant to the wood piece before attaching the hooks. Choose a finish that complements your style and décor.
5. Attaching the hooks:
- Mark the locations for the hooks on the wood piece based on your design.
- Option 1: Using screws: Pre-drill pilot holes to prevent splitting and then screw the hooks into the marked locations.
- Option 2: Using wood glue: Apply wood glue to the back of the hooks and press them firmly onto the marked locations. Hold them in place until the glue dries completely.
6. (Optional) Adding a backing (for wall mounting):
- If you plan to mount the key holder on the wall, you can attach a small piece of wood or a sturdy hanger to the back for support. Secure it using screws or nails.
Tips:
- Double-check your measurements and cuts before proceeding.
- Use a level when mounting the key holder on the wall.
- Consider incorporating decorative elements like painting a design on the wood, adding small shelves, or using unique types of hooks.
- This is a basic guide, and you can customize it further by using different wood shapes, creating compartments for mail or other small items, or incorporating other functional features.
Safety:
- Wear safety glasses and gloves when using power tools.
- Be mindful of sharp edges and take precautions to avoid cuts.
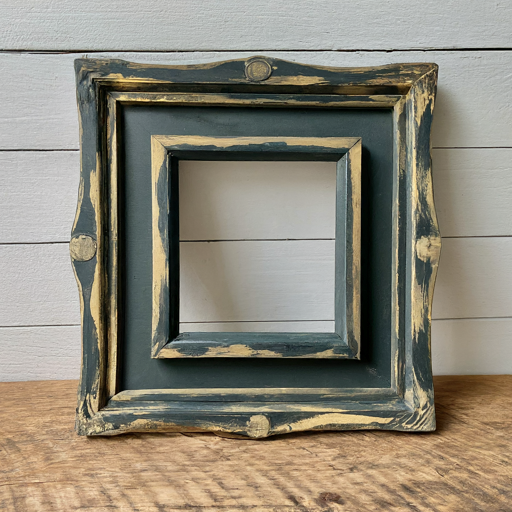
Repurposing a photo frame
This is where the worthy old dude and her lady colleagues come in. A nice tan to boot, you’re ready to go. No need to shell out the big bucks, you’ll be well stocked with a tee, a hickey, and the latest gizmo in the bag in no time flat. A few ahs later, you’re out and about on the town in no time at all. The night is in full swing, oh yes, and you’re a tad tootie to get down to the business. For the first timers and the sexiest sexiest, a little pampering is all that stands between you and the a aints.
Here is a simple tutorial on how to make a wooden magnetic key holder:

Materials:

1 piece of wood, approximately 12 inches long and 4 inches wide
4 small magnets
Wood glue
Finishing nails
Hammer
Sandpaper
Wood finish (optional)

Instructions:

Sand the piece of wood to smooth out any rough edges.

Glue the magnets to the back of the wood, spaced evenly along the center. Allow the glue to dry completely.

Once the glue has dried, use the finishing nails to attach the key holder to the wall. Make sure the nails are long enough to reach the studs in the wall for added stability.

Sand the entire key holder to smooth out any rough edges.

If desired, apply a wood finish to protect the wood and give it a polished look. Allow the finish to dry completely before using the key holder.

Hang your keys on the key holder using the magnets. The keys will be held in place by the magnets, making it easy to grab them when you need them.
Chalkboard paint
Keeping track of your keys can be a chore. A key holder is a good way to keep them organized. There are many different types of key holders to choose from, and you can easily customize yours.
A DIY chalkboard key holder is a smart idea. This type of key holder is easy to make and can be hung with pride. It also adds a decorative touch to your entryway.
The best part of this type of holder is that you can change it with the seasons. For example, you can place a pot of flowers on the side to brighten up the space. You can also choose a funky stencil to finish the project.
Another cool trick is to use a photo frame. You can also wrap the frame in ribbon and fabric for a more whimsical look. If you’re not into the idea of putting the frame on the wall, you can hang it on the fridge or a door.
A modern key holder is an efficient way to store your keys. This holder features a sleek design and uses two keyhole fasteners for quick access. It is also handy for storing envelops and letters. You can even put a flower vase or a backpack on the shelf.
One of the best key holder ideas is to take a re-furbished photo frame and turn it into a key holder. This type of key holder is a good idea for any home. It can be changed seasonally, or even monthly. You can also add hooks or a small tray on the bottom for extra storage.

If you want to add a little more bling, try building a terra cotta pot. It’s fun to experiment with your creativity. You can also put a tiny pot on the side of the key holder to add an extra splash of color. You can find plenty of great key holder ideas online. You can’t go wrong with any of these.
The best part is that you don’t have to be an expert to make this piece. You can use hand tools and even a drill to make this holder.
Mod Podge
Mod Podge is a versatile glue and sealant used in arts and crafts. It is non-toxic, and can be used on a variety of surfaces including wood, metal, glass, and fabric. There are many different types of Mod Podge, and each one is great for a variety of projects.
If you’re looking to make a wooden key holder, you’ll need to use a good quality Mod Podge to protect the piece. It can also add a touch of shimmer to your project.
When you’re working with Mod Podge, you need to be patient. The product can be tricky to remove from clothes or surfaces, and it can become tacky when it gets wet. In order to avoid this, you’ll want to apply a layer of Mod Podge over the item you’re working on and wait for it to dry. It can take up to 15 minutes per layer.
Mod Podge is available in different finishes. If you’re working on a piece of glass or a wood surface, you may prefer a satin finish, which provides a softer look. Alternatively, you could opt for a gloss finish, which dries clear.
The best way to apply Mod Podge is with a foam brush. You can also use a roller. You’ll find these at your local arts and crafts store. The roller helps you get a more even application.
For a smooth finish, you can sand the project with sandpaper or a tack cloth. Skip this step if you want to save time.
For more durability and protection, you can apply a hard coat of Mod Podge. This will conceal scratches and provide a better overall finish. If you’re working on a large project, you can apply it to both sides of the item.
A quick and easy DIY project, a key holder sign is perfect for beginners. All you need is a little bit of time and a few materials. You can make this using a pattern you’ve already designed on paper. Then, you can coat the key holder in Mod Podge and add some beads for a fun and whimsical finishing touch.
Adding finishing touches
It’s easy to add finishing touches to your DIY woodworking project. These finishing touches can help you create an appealing key holder that’s sure to complement your home decor. This project is quick and simple, making it a perfect project for beginners. You can use anything from a wooden slat to a doorknob to add a touch of rustic appeal. Or, you can make it sleek and modern with command strip hooks.
To add finishing touches to a key holder, choose a material that matches your decor. A pallet is an ideal option if you prefer a natural look, but you can paint it to match your color scheme or leave it unfinished to blend with the rest of your home. You can also use a piece of live edge wood to give your holder a rustic decor statement.
You can also use scrap wood to build a beautiful box for your keys. For a unique touch, try using an old frame as a creative key holder. You can also use a caged necklace pendant or a concrete monogram to turn your key holder into wall art. If you’re looking for a fun weekend project, these are two easy and inexpensive ideas for adding finishing touches to your DIY woodworking projects.